Have you ever heard of a dessert made from water? Sounds impossible, right? But during the Great Depression, creativity thrived in kitchens, giving birth to ingenious recipes like this water pie recipe. This timeless dessert is a delicious reminder of how simplicity can lead to pure magic. It’s the perfect choice when you’re low on ingredients but still want to whip up something sweet and satisfying. Plus, the process is so easy that even first-timers can ace it without breaking a sweat.
Imagine a dessert that’s as light as it is comforting—just the thing to bring a smile to your face after a long day. Whether you’re nostalgic for vintage recipes or just curious about its unique appeal, this pie checks all the boxes. Keep reading, and you’ll discover why this water pie deserves a spot in your baking repertoire. Trust me, you’re going to love it!
Table of Contents
The Story Behind Water Pie and the Great Depression
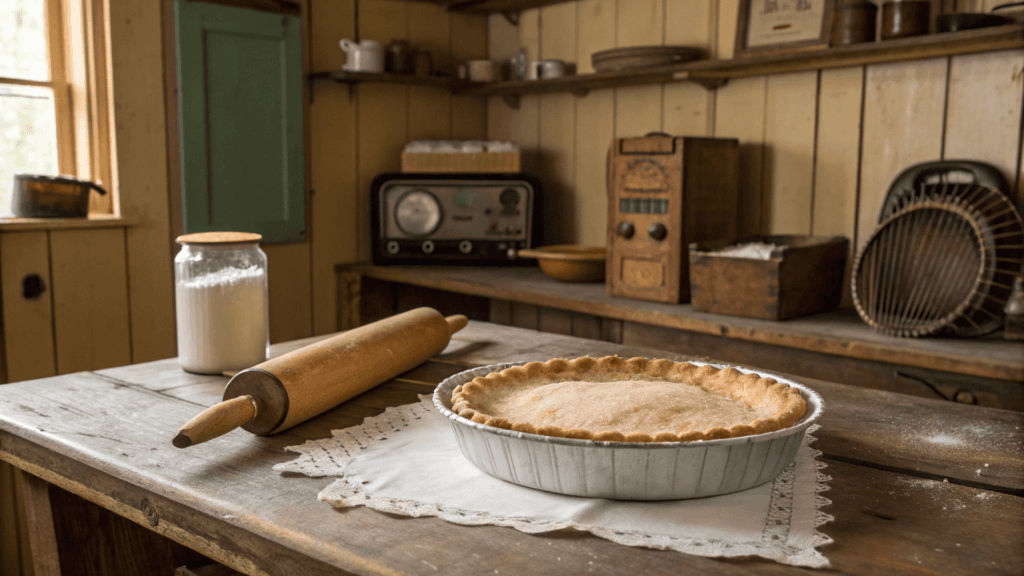
Depression Pie: A Symbol of Resilience
When times are tough, creativity in the kitchen often shines brightest. Water pie, often called depression pie, emerged as a testament to this ingenuity during the Great Depression. Families needed to stretch what little they had, so they turned to basic pantry staples. Water pie proved you didn’t need expensive ingredients to create something comforting and delicious. It’s a simple dessert that feels like a warm hug.
The key to its charm lies in its simplicity. Flour, sugar, and butter—common staples then and now—combine to form a pie that’s surprisingly satisfying. For many, it wasn’t just a dessert; it was a symbol of perseverance. Families found joy in making something special even when resources were scarce.
You’re going to love how easy it is to recreate this nostalgic treat. First, it’s affordable. Next, it’s quick to prepare. Finally, it brings a piece of history to your table. Try it out—you’ll be amazed at what a little creativity can do!
In the spirit of culinary exploration, this recipe showcases how basic ingredients can yield a magical result. Pairing this dessert with other comfort foods like baked ziti with no meat can create a cozy, nostalgic meal.
Why Water Pie Defined Budget-Friendly Desserts
Water pie rose to popularity because it was incredibly practical. During the Great Depression, families relied on ingredients that were always on hand. This made water pie an easy choice when money was tight but desserts were still a craving. The recipe uses simple components, ensuring nothing went to waste.
The process is straightforward. First, you make a basic crust. Then, you mix water, sugar, and flour for the filling. Finally, butter is added on top, creating a rich flavor with minimal effort.
Here’s a breakdown of why water pie was so beloved:
| Reason | Details |
|---|---|
| Budget-Friendly | Uses pantry staples, no specialty items. |
| Quick and Easy | Simple steps, ready in under an hour. |
| Family Favorite | A dessert everyone could enjoy. |
This dessert proved that you don’t need fancy ingredients to create something memorable. It’s a great reminder that sometimes, simplicity is all you need.
If you’re fascinated by how simple ingredients can elevate a dish, consider exploring other Depression-era delights, like this pumpkin pie recipe with condensed milk. You’re going to love bringing this vintage favorite to life in your own kitchen!
Ingredients You’ll Need for the Perfect Water Pie
Simple Pantry Staples for This Depression-Era Recipe
One of the reasons the water pie recipe became so popular during the Great Depression is its simplicity. You don’t need fancy ingredients or expensive items to make it. In fact, you probably already have everything in your kitchen. Flour, sugar, water, and butter are the core components of this vintage dessert. These basics come together to create something surprisingly delicious.
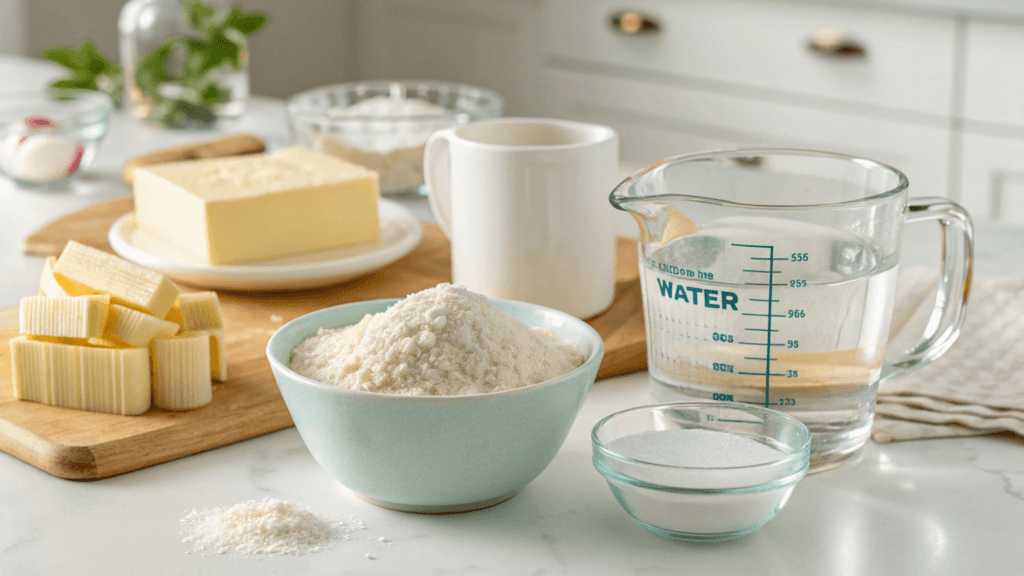
Start with all-purpose flour, which serves as the backbone of the crust. Then, add sugar to give it that perfect sweetness. Water acts as the filling’s base, giving the pie its name and unique texture. Butter ties it all together, adding a touch of richness that makes the pie feel indulgent without breaking the bank.
Here’s a quick list of what you’ll need:
| Ingredient | Amount Needed | Purpose |
|---|---|---|
| All-Purpose Flour | 1 cup | For the crust and thickening. |
| Sugar | 1 cup | Adds sweetness to the filling. |
| Water | 1 1/2 cups | The main ingredient in the filling. |
| Butter | 5 tablespoons | Adds richness and flavor. |
Having these simple ingredients on hand means you can whip up a water pie anytime. First, gather your staples. Then, get ready to create a dessert that’s equal parts charming and easy to make.
Ingredient Substitutions to Fit Modern Kitchens
If you’re out of some ingredients or want to adjust the recipe, no problem! This water pie recipe is super flexible, which makes it perfect for modern kitchens.
- Replace all-purpose flour with gluten-free flour for a gluten-free version.
- Use brown sugar instead of white sugar for a deeper flavor.
- Swap butter for plant-based alternatives for a dairy-free option.
- Try adding a pinch of cinnamon or nutmeg for extra warmth and aroma.
Quick Tips for Modern Adjustments:
- Choose unsalted butter for better flavor control.
- Use chilled water to make the crust easier to handle.
- Experiment with coconut sugar or honey for a natural sweetener twist.
| Substitution | Why It Works |
|---|---|
| Gluten-Free Flour | Keeps the crust structure intact. |
| Brown Sugar | Adds a caramel-like richness to the filling. |
| Plant-Based Butter | Creates a dairy-free alternative. |
The beauty of this recipe is its adaptability. No matter what you have in your pantry, you can always make adjustments and enjoy this delightful dessert. So, grab your ingredients (or their substitutes) and start baking—it’s going to be a treat!
How to Make a Delicious Water Pie
Step-by-Step Preparation Guide
Making a water pie recipe is surprisingly simple and fun. First, gather your ingredients. Having everything measured and ready will make the process smooth. Start by preparing your pie crust. If you’re using a pre-made one, let it come to room temperature. If making it from scratch, mix flour, butter, and a pinch of salt until crumbly, then add water to bring it together. Roll out the dough and press it into a pie pan.
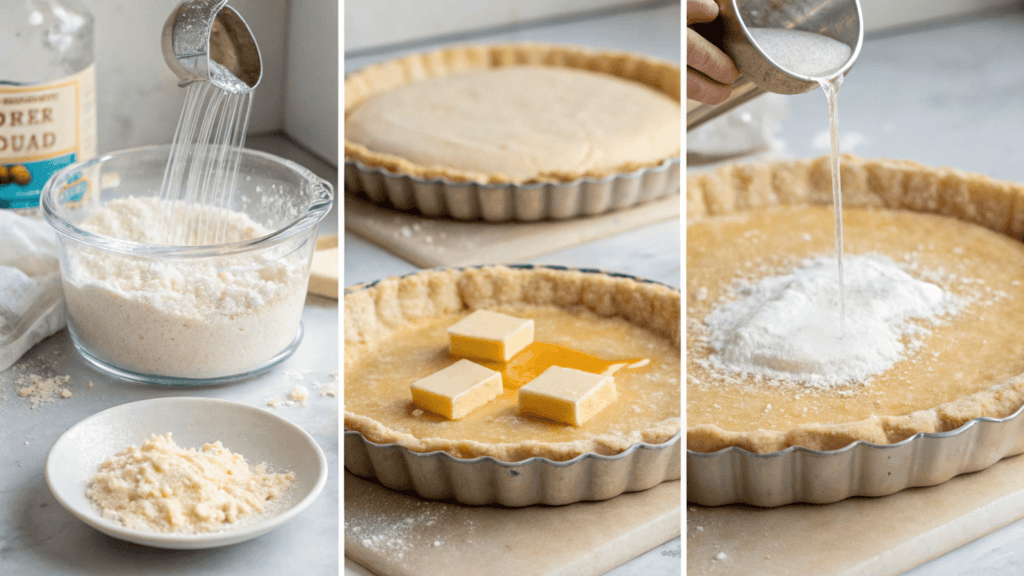
Once the crust is ready, it’s time to create the filling. Begin by pouring the water directly into the crust. Yes, plain water! Sprinkle the sugar evenly over the water. Then, sift the flour and sprinkle it on top. Next, add small pieces of butter over the surface to give it richness. Finally, avoid stirring—this helps create the magic texture as it bakes.
| Step | What to Do |
|---|---|
| Prepare Crust | Roll out and press into a pie pan. |
| Add Water | Pour 1 ½ cups of water into the crust. |
| Sweeten It | Sprinkle sugar evenly across the water. |
| Flour It Up | Sift and sprinkle flour over the sugar layer. |
| Add Butter | Dot with butter to enhance flavor. |
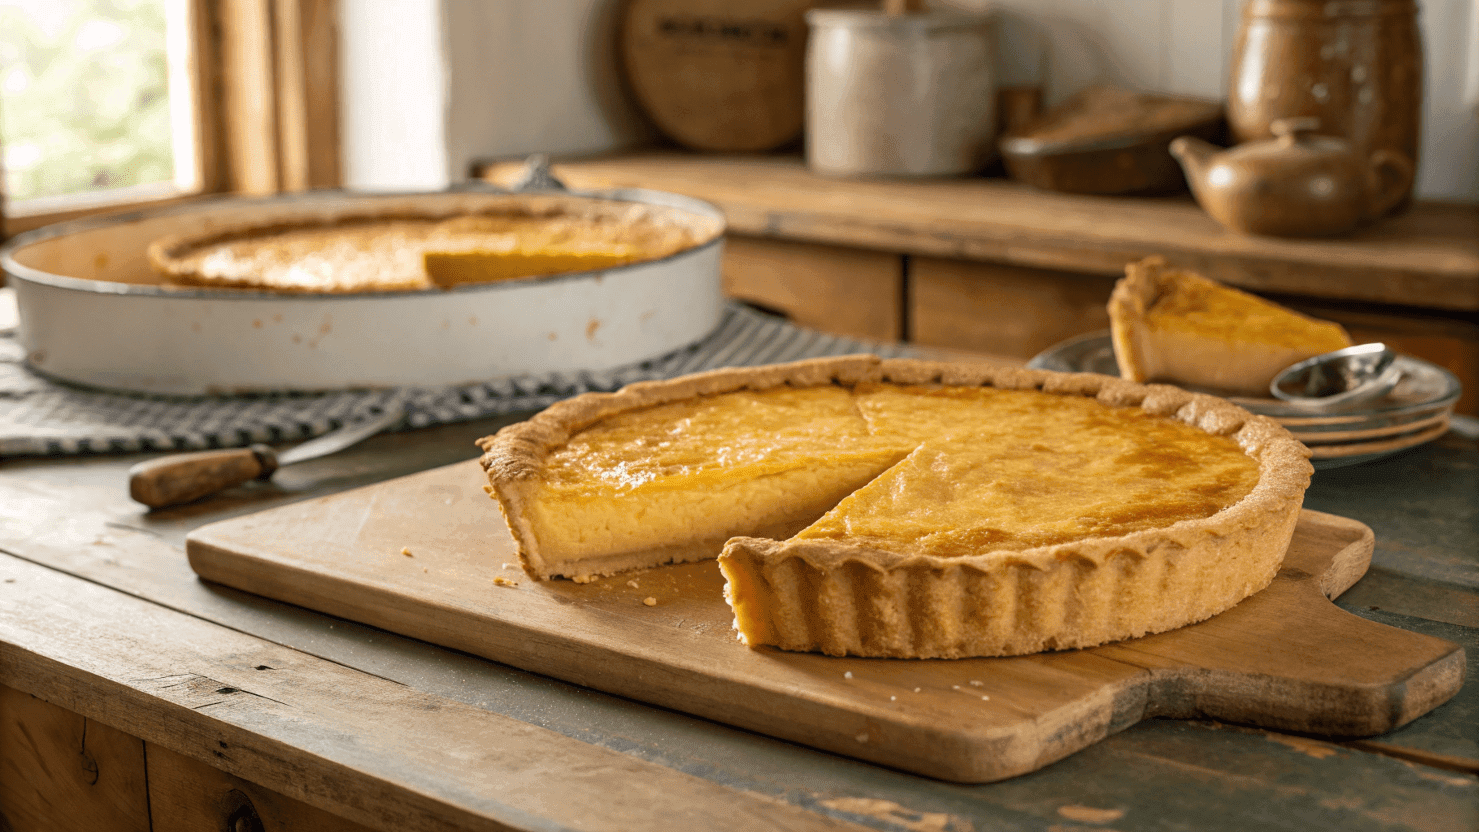
Once everything is ready, place the pie in the oven at 400°F (200°C). Bake for about 30 minutes, then reduce the temperature to 375°F (190°C) and bake for another 30 minutes. The pie will develop a slightly golden top. Let it cool before slicing.
Baking Techniques for a Flawless Crust
A great crust makes all the difference in this water pie recipe. Follow these tips to ensure success every time:
- Use cold butter for a flaky texture.
- Don’t overwork the dough; it should stay slightly crumbly.
- Chill the dough before rolling it out to prevent shrinking.
- Pre-bake the crust slightly if you prefer a firmer base.
Quick Tips for Baking:
- Line the crust with parchment and add pie weights to avoid bubbling.
- Check the edges halfway through baking; cover with foil if they brown too quickly.
- Let the crust cool before adding the filling for a crispier result.
| Technique | Why It Works |
|---|---|
| Chill the Dough | Prevents shrinking during baking. |
| Use Pie Weights | Keeps the crust flat and even. |
| Cover Edges | Protects from over-browning. |
By following these steps, you’ll end up with a flawless crust and a perfectly baked water pie. It’s easier than you think, and the results will impress everyone at the table!
Exploring the Nostalgic Appeal of Water Pie
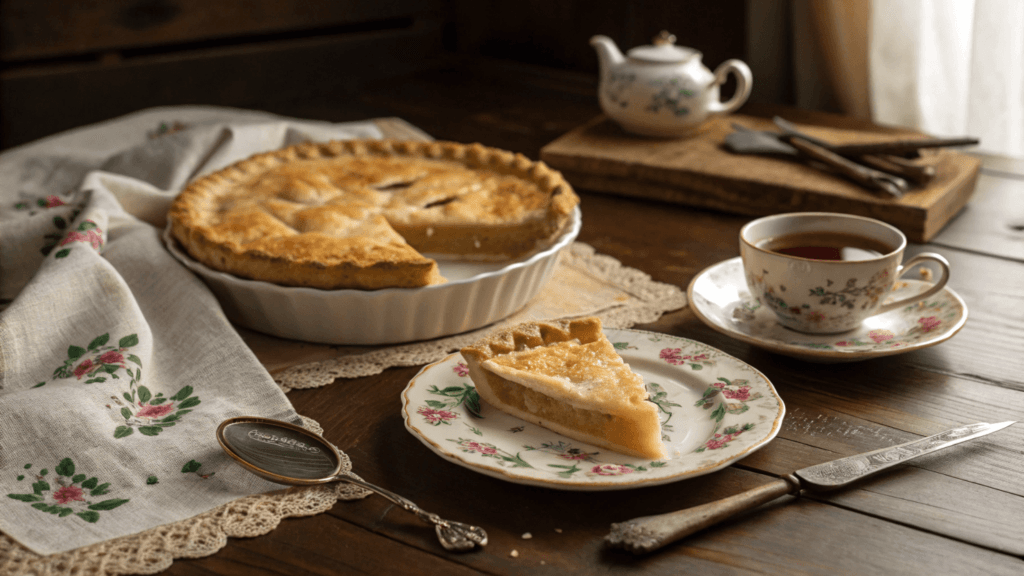
What Makes Water Pie a Timeless Dessert?
There’s something magical about recipes that stand the test of time, and water pie is no exception. Its simplicity, affordability, and unique flavor make it a dessert you’ll want to come back to again and again. Born out of necessity during the Great Depression, this pie was a way for families to create something sweet and satisfying with just a few ingredients.
First, it’s all about the nostalgia. Water pie reminds us of a time when resourcefulness was key, and every bite feels like a connection to the past. Next, it’s incredibly simple to make, which is perfect for busy days. Also, its versatility allows you to add your own twist while keeping the essence of the original recipe alive.
Water pie isn’t just a dessert—it’s a story. It tells us that even in tough times, creativity and heart can bring joy to the table. Give it a try, and you’ll see why it’s still cherished today.
The enduring appeal of the water pie lies in its simplicity. It’s affordable, quick to prepare, and requires minimal effort. Much like the comforting richness of Gouda cheese, water pie has a way of making you feel at home with every bite.
Great Depression Cooking: Lessons for Today
The Great Depression taught us many valuable lessons, especially when it comes to cooking. Recipes like the water pie recipe emphasize the importance of making the most of what you have. This is a skill that’s still useful today, especially when we want to save money or reduce food waste.
Key takeaways from Great Depression cooking include:
- Resourcefulness: Use what you have and substitute creatively.
- Simplicity: Stick to basic, accessible ingredients.
- Appreciation: Find joy in creating something out of almost nothing.
| Lesson | Why It Matters Today |
|---|---|
| Resourcefulness | Reduces waste and saves money. |
| Simplicity | Makes cooking accessible to everyone. |
| Creativity | Encourages thinking outside the box. |
Quick Tips Inspired by Great Depression Cooking:
- Look for ways to repurpose leftover ingredients.
- Choose pantry staples that are versatile for multiple recipes.
- Experiment with simple combinations—you might surprise yourself!
| Tip | How to Apply It |
|---|---|
| Use Pantry Staples | Build meals around common ingredients. |
| Repurpose Leftovers | Create soups, pies, or casseroles. |
| Keep It Simple | Focus on flavor, not complexity. |
Water pie is more than just a dessert—it’s a reminder that creativity can thrive even in the most challenging circumstances. By embracing these lessons, you’ll not only enjoy a delicious treat but also appreciate the timeless wisdom behind it.
Serving, Storing and Enjoying Your Water Pie
Presentation Tips for a Vintage-Inspired Dessert Table
Serving your water pie isn’t just about enjoying a slice—it’s about creating an experience. To embrace its vintage charm, think of ways to present it in a way that honors its roots. Start by placing the pie on a classic pie stand or a rustic wooden board. This instantly gives it a farmhouse feel.
Next, consider pairing the pie with simple touches, like linen napkins or floral-patterned plates. These small details add warmth and character to your dessert table. Also, if you’re serving guests, add a dollop of whipped cream or a sprinkle of powdered sugar on each slice. This gives the pie a finished look without taking away from its simplicity.
For a modern twist, you can serve this vintage treat alongside savory dishes like baked pasta or creamy casseroles. Try it after making a delightful peach cobbler recipe to round out a perfect dessert spread.
Tips for Presentation:
- Use mismatched vintage plates for an authentic feel.
- Add a small chalkboard sign labeling the pie as “Water Pie Recipe” to spark curiosity.
- Include a pot of tea or coffee to complete the vintage vibe.
| Presentation Idea | Why It Works |
|---|---|
| Classic Pie Stand | Elevates the pie and draws attention. |
| Floral Napkins | Adds a touch of elegance and color. |
| Powdered Sugar Garnish | Enhances the pie’s visual appeal. |
By adding these thoughtful touches, you’ll create a dessert table that looks just as delightful as the pie tastes.
Best Practices for Storing Depression Pie
Water pie is best enjoyed fresh, but storing it properly ensures you can savor it for days. Begin by allowing the pie to cool completely at room temperature. Once cooled, cover it tightly with plastic wrap or aluminum foil. This keeps the pie from drying out while maintaining its texture.
For short-term storage, place the pie in the refrigerator. It will stay fresh for up to 4 days. If you want to save it for later, freezing is also an option. Wrap the pie tightly in plastic wrap, then place it in a freezer-safe bag or container. To reheat, let it thaw overnight in the fridge and warm it in the oven at a low temperature.
Quick Storage Tips:
- Keep the pie in an airtight container to lock in freshness.
- Store individual slices for grab-and-go convenience.
- Avoid storing the pie at room temperature for extended periods.
| Storage Method | Duration | Best For |
|---|---|---|
| Refrigeration | Up to 4 days | Fresh consumption. |
| Freezing | Up to 1 month | Long-term storage. |
| Room Temperature | Up to 12 hours | Immediate serving. |
Tips for Reheating:
- Preheat the oven to 300°F for gentle warming.
- Cover the pie loosely with foil to prevent over-browning.
- Enjoy it warm with a scoop of ice cream or a drizzle of honey.
With these tips, you’ll ensure your water pie remains just as tasty as the day you made it. Sharing leftovers? Your friends will be just as impressed the second time around!
Frequently Asked Questions (FAQs)
What does a water pie taste like?
Water pie has a unique taste that’s sweet and comforting. It’s light, with a creamy texture that melts in your mouth. The buttery top layer adds richness, while the sugar gives it just the right amount of sweetness. Imagine a cross between custard and a pie crust—simple yet delicious. This water pie recipe is a nostalgic treat you’re going to love!
What is Dolly Parton pie?
Dolly Parton pie, also known as chess pie, is a rich Southern dessert. It’s made with sugar, butter, eggs, and a touch of cornmeal. The pie has a caramel-like flavor with a smooth, custard-like filling. It’s sweet, simple, and full of charm, just like Dolly herself! If you love classic desserts, this is another pie you’ll enjoy baking.
What is Tennessee’s favorite pie?
Tennessee’s favorite pie is pecan pie. This Southern classic is filled with sweet, gooey pecan filling and a flaky crust. The combination of crunchy pecans and caramelized sweetness makes it irresistible. Served warm with whipped cream or ice cream, it’s a dessert you’ll want to share. If you’re visiting Tennessee, you’ll find it on many menus. It’s truly a crowd-pleaser!
Why do you put milk instead of water in a pie crust?
Adding milk instead of water to a pie crust gives it extra flavor and tenderness. Milk’s fat content helps create a softer texture and a slightly golden color. It also adds a subtle richness that water can’t provide. If you’re making a sweet pie, milk enhances the overall taste. Try it next time for a buttery, melt-in-your-mouth crust!
Conclusion: Celebrate Simplicity with Water Pie
Water pie is more than just a dessert—it’s a story of resilience and creativity. First, it shows how a few simple ingredients can create something magical. Then, it reminds us of a time when making the most of what you had was a necessity. This humble recipe has a charm that’s hard to resist.
If you’re looking for a fun and easy dessert, this water pie recipe is perfect. It’s budget-friendly, quick to prepare, and packed with nostalgia. Also, it’s a great way to connect with history while enjoying a sweet treat.
Now it’s your turn to give it a try! Gather your ingredients, follow the steps, and enjoy every bite. You’re going to love the simplicity and flavor of this vintage dessert. Share it with friends, or keep it as your little secret—it’s totally up to you!

4 thoughts on “Water Pie Recipe: Discover the Great Depression’s Sweetest Secret”